Looking Your Best on Camera
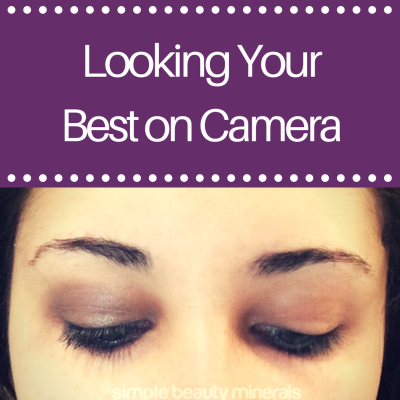
A makeup tutorial checklist for looking your best on camera using mineral makeup.
As a photographer, even though most of the time I am behind the camera (apart from my SBM blog posts, of course!), I have had the opportunity to really learn what looks good (and how to look good!) in photos.
Makeup Planning Do's and Don'ts
So, when family photo time rolls around and I inevitably DO end up on the other side of the camera and in a bunch of pictures, I like to go through a little checklist in my head of “do’s” and “don’ts” as I’m planning out my makeup for the day to make sure that I am putting my best face forward for the camera– and not accidentally playing my features down or exaggerating imperfections on camera. I thought that since Summer is in full swing and we are right in the middle of family reunion season, now would be the perfect time to share these tips with you to help you feel confident and put your best face forward in all your family pictures, too! This week is my husband's "mini" family reunion in Santa Barbara– so of course we are getting out my camera, a tripod, and our color-coordinated clothes to snap a few memories and Christmas card pics! I thought it would be fun to take you with me as I get ready and go through my little tip checklist together...
Featuring Dream Mineral Eye Shadow
First off to set the stage: I chose to go with one of my absolute favorite purple mineral eye shadows– Simple Beauty Mineral’s Dream Mineral Eye Shadow. Because I have green eyes, using purple really makes them “pop”– especially on camera.

Swatch of Dream Mineral Eyeshadow
Enhance YOUR Features
Since the “color scheme” for our family photos are Navy Blue, Grey, White, and Denim though, I didn’t want to do go overboard on the purple since it was technically a color in the “theme”– however, I knew that if I matched it up with slightly a more neutral color I could make sure that the purple didn’t steal the show while still letting it enhance my eyes and help them pop.

I mixed Mystery Mineral Eye Shadow with Soft Touch to cut the color pop a little, but still keep with the cool, shimmery feel of Dream. I applied the mix of Mystery and Soft Touch over my whole lid, and then blended Dream into my crease, and slightly down onto the outer half of my lid so that there were no harsh lines.

Left eye: with Dream, Mystery, & Soft Touch; Right Eye: No makeup yet! See the difference?!
Enjoying this bit of Simple Beauty? Click HERE for 20% off your first order!
Alright, now onto the tips!
Enhance YOUR Features
1. Pick colors that compliments your eye color and skin tone. If you have brown eyes and a warm skin tone, your color of choice will probably be totally different from mine! If, like me, you have green eyes and a cool skin tone, you might find yourself picking out the same exact colors that I tend to go for.
Experiment Yes, But Not Today
2. My biggest tip on this is to pick an eyeshadow/blush that you know from experience works for you– family photos are not the best time to try out a totally new look because you might not know until you get the photos back how it shows up on camera, or how it looks in bright natural light. It could look completely different outside captured on high end photography equipment that it looks in your bathroom mirror as you’re running out the door! Skip the heavy eyeliner. Although (as you may know) I am *all* about eyeliner, I personally always skip a heavy line on my upper lid for photos. If you use too much dark eyeliner, it will make your eyes look much smaller in photos. This is not the look I’m going for, so I actually prefer to do the opposite and line my lower lashline with a highlight (like Bliss, Champagne Ice, or Glitz!) and skip the liner on top altogether. I do still apply pencil eyeliner to my waterline and tightline because I like the definition it gives and I like how it looks in photos, but this is totally up to you!
Lashes!
3. Go wild with you lashes! Seriously. Before I became a photographer, I didn’t realize how hard it is to make lashes really stand out on camera. Family Photo day is not the day to skimp on your mascara! I have recently started applying false lashes for formal portraits because I noticed what a huge difference they make on camera. I never wear falsies apart from this– but I would highly recommend them for professional photos.
Matte is Best
4. Go matte. This is definitely a personal preference, however for photos (especially if there will be flash involved) I always use my Simple Beauty Minerals Matte Finish Powder because I don’t want to risk any random shiny spots on my face showing up in the pictures. I only want the highlight on my cheeks to be shimmery/shiny on camera– not the middle of my chin or forehead…! Although I rarely use the matte finishing powder in my everyday makeup routine as I do not have oily skin and I tend to like a bit of dewy glow, in photos the “rules of the game” are a little different because of how things are captured differently on camera.
Lips!
5. Don’t forget your lipstick! This is a big one, too– which I happened to learn the hard way… A couple of years ago I forgot to apply any lip gloss/lipstick before Jack and I were having our photos taken by a friend, and when I got the pictures back my lips looked super pale and bland– it was strange because in real life I know that my lips don’t look that pale when I don’t wear lipstick? I hadn’t accounted for the fact that since I had applied so much makeup to the rest of my features to make them really pop, forgetting my lips left them at a huge disadvantage. Over the years, I have seen the huge difference that even applying a nude lipstick or gloss will make in really bringing out your pout in photos!
Your Best Side
6. Bonus tip: When you are posing, make sure that your arms arm not pressed in tightly to your sides, and that you are not standing facing straight on to the camera. This is literally no gal’s best angle! You want to make sure that you are turning your body at an angle towards the camera– facing your body slightly away from the camera (shoulder and hip facing the camera more than your belly button!) with your hand on your hip is one of the easiest, most fool proof, and most flattering angles and one of my go-tos in family shots. When you are in a big group, it is less likely that the photographer will have the time or the ability to let everyone know one by one what their best angle/pose is, and apart from the basics you will most likely mainly be on your own, so do yourself a favor and try this out (maybe even practice a couple of times in the mirror beforehand so you’ve got it down exactly how you like it by the time you are in the middle of all the family photo chaos so you don’t even have to think about it– this is totally what I do!)


 Abby is a photographer and blogger who never says no to a hot cup of tea or a new shade of lipstick. She lives in Monterey, CA with her husband where they enjoy hiking, cooking/eating everything vegan, and basically living the (neat and tidy) hippie dream. You can follow her @galaxyandglowworm and @abbyroephoto on instagram, or find her + her organic handmade mineral lipsticks at Galaxy and Glowworm .
 Note from Lisa: Simple Beauty Minerals makeup is beautiful for photos shoots - there was a day when older mineral makeup brands /formulas could cast a white shadow on your face when photographed, but the newer pigment technology has evolved - and SBM is a safe photo shoot formula, all the way around. Just ask our resident photographer, Abby!
Enjoyed this bit of Simple Beauty? Click HERE for 20% off your first order!